If you want to always keep the CPU usage stats somewhere on your computer so that you can monitor it, there’s a workaround. In this guide, we will show how you can keep the CPU Stats and other useful data in the system tray for easy access and monitoring.
Show CPU Stats in the Taskbar in Windows 10
Step 1: Open the Task Manager on your Windows 10 computer. You can do so by right-clicking the taskbar and selecting “Task Manager” from the menu. Alternatively, you can also press Ctrl + Shift + Esc keys on the keyboard.
Step 2: Click on the “Options” from the top-bar menu and from the drop-down list, click “Hide when minimized.”
Step 3: Now, minimize the Task Manager application and you will notice that the app is not shown on the Taskbar but has actually minimized to the system tray.
You will now see that the system tray icon shows a graph that indicates the CPU usage of your computer. If you hover the mouse pointer on that icon, the tooltip will reveal more details, including CPU, Memory, Disk, and Network usage.
To reopen the Task Manager, you can double-click on the CPU Usage icon in the system tray. To close the task manager and get rid of the CPU stats from the tray, just close the app by clicking the “X” icon in the top-right corner.
Click Sign in (at top right), and select Analytics.
If you are already signed in to Google (e.g. you are signed in to your Gmail account), you’ll be taken directly to the Analytics user interface. Otherwise, you will be prompted to enter your Google account (e.g. Gmail account) and password. Once you have signed in to Analytics, you can open the account search at the top of any Analytics page to see the accounts, properties, and views to which you have access.
If you’ve linked Analytics to a Google Ads account, you can access your Analytics views and reports at any time by clicking Tools > Measurement in your Google Ads account. Use the menu on the tab to select Analytics.
Set up a reporting view in your property. Views let you create filtered perspectives of your data; for example, all data except from your company’s internal IP addresses, or all data associated with a specific sales region.
Follow the instructions to add the tracking code to your websiteso you can collect data in your Analytics property.
Link your Google Ads and Analytics accounts so you can share data between them and develop a more comprehensive understanding of how your marketing efforts drive user behavior on your sites or apps. Learn more about linking your accounts.
Set up reporting views so you can align Analytics users and relevant data. Learn more about views.
Set up goals to identify the actions you want users to take on your site or app, and to give a monetary value to those actions. Learn more about setting up goals.
Modify your tracking code to collect additional data such as:
User interactions with links, buttons, video controls, and other dynamic elements of your site or app. Learn more about event tracking.
Ecommerce activity like user engagement with product lists and internal promotions, and how successfully users moved through your purchase funnel and checkout process. Learn more about ecommerce and enhanced-ecommerce data collection and reporting.
Download the Analytics app
Once you have installed the tracking code on your site or app, and have configured your Analytics account, download the Analytics app from Google Play so you can take Analytics reporting with you anywhere (well, anywhere you have a connection).
Note: Facebook page cover templates come sized at double the recommendation (1640 x 924) to help prevent any chance of a cover photo travesty.
Instagram image sizes
Social media image type
Dimensions in pixels
Instagram Ad / Carousel Ad
1080 x 1080
Instagram Post
1080 x 1080
Instagram Profile Photo
360 x 360
Instagram Landscape Photo
1080 X 566
Instagram Portrait
1080 x 1350
Instagram Story
1080 x 1920
IGTV Cover Photo
420 x 654
Note: Similar to Facebook covers, Instagram profile picture templates are sized higher to help prevent your image from becoming distorted when uploaded to Instagram. Just make sure to center the focus of your image in order to account for the circle cropping.
Twitter image sizes
Social media image type
Dimensions in pixels
Twitter Header Photo
1500 x 500
Twitter Profile pic
400 x 400
Twitter Lead Generation Card
800 x 320
Twitter Post
1024 x 512
LinkedIn image sizes
Social media image type
Dimensions in pixels
LinkedIn Company Cover
1128 x 191
LinkedIn Cover Photo
1584 x 396
LinkedIn Profile
400 x 400
LinkedIn Post
1400 x 800
LinkedIn Sponsored Ad
1200 x 627
Pinterest Pin sizes
Social media image type
Dimensions in pixels
Static Pin
1000 x 1500
Ad Pin
1000 x 1500
Video Pin
1000 x 1500
Carousel Pin
1000 x 1500 or 1000 x 1000
Carousel Ad Pin
1000 x 1500 or 1000 x 1000
Shopping Ad Pin
1000 x 1500
Collection Pin
1000 x 1500
Idea Pin
1080 x 1920
YouTube image sizes
Social media image type
Dimensions in pixels
YouTube Banner / Channel Art
2560 x 1440
YouTube Thumbnail
1280 x 720
YouTube Channel icon
800 x 800
YouTube Intro
1920 x 1080
YouTube Outro
1920 x 1080
YouTube Display Ad
300 x 250
YouTube Display Ad Long
300 x 60
YouTube Overlay Ad
480 x 70
Snapchat image sizes
Social media image type
Dimensions in pixels
Snapchat Filter
1080 x 2340 (PNG < 300 KB)
Snapchat Story Ad
360 x 600
Snapchat Ad
1080 x 1920
Etsy image sizes
Social media image type
Dimensions in pixels
Etsy Shop Big Banner
3360 x 840
Etsy Shop Mini Banner
1200 x 160
Etsy Profile Photo
500 x 500
Etsy Order Receipt Banner
760 x 100
Etsy Shop Icon
500 x 500
Etsy Item Listing Photo
min 2000 on short edge
Additional banner sizes (collage banner, carousel banner) are available to Etsy Plus users. Please see here for more details.
Twitch image sizes
Social media image type
Dimensions in pixels
Twitch Highlights
1920 x 1080
Google My Business Image Sizes
Social media image type
Dimensions in pixels
Google My Business Post Image Size
400 x 300 Minimum // 800 x 600 // (4:3 Ratio) Default Size – 720 x 540 pixels Maximum Size – 2120 x 1192 pixels Minimum Size – 480 x 270 pixels Aspect Ratio – 4:3
This is one of my favorite things to do to Recap the previous year in my new planner.
I usually start with this to appreciate the last years highs and lows and it helps to create memories and fill in gaps between the blank weeks (where I didn’t fill in anything…oops!)
I print this on Staples Shipping Label Paper (or any Letter size sticker paper) Then work on it loose – then stick it over the “intro” pages at the front of the next year.
Having issues with page role requests on your company Facebook page? Don’t worry, you’re not alone. Unfortunately this happens pretty often, but there’s usually a way to get around it.
If you’re trying to get someone to add you to a Facebook page:
First, you need to LIKE the page to which you’re trying to be added as a user.
If someone sends you an page role request and you don’t see the request as a notification when you login to Facebook, follow this link: https://www.facebook.com/pages/?category=invites and you should be able to see and accept the request there.
If you still can’t see the request, you should wait an hour or so and then log out of Facebook and log back in.
If you’re trying to add someone to your Facebook page:
If you’re already a user on the Facebook page, but are trying to add another user, here’s what you need to do (if you are NOT an Administrator on the page, then you need to have an Administrator complete the following steps):
Login to your personal Facebook and go to the Business page.
Click Settings at the top right of the Page.
In the left column, find and click Page Roles.
Under Assign a New Page Role, type a name or email in the box and select the correct person from the list that appears.
Click Editor to select a role from the drop-down menu, and then select Admin.
Click Add and enter your password to confirm.
If the person you’re trying to add doesn’t show up in the drop-down list, then you need to make sure the person has LIKED the page you’re trying to add him to.
This is an advanced tutorial and is not supported by Media Wizard Studios. Knowledge of HTML and CSS is required.
Uploading your font
To get started, you will first need to upload the font into the Assets folder of your theme.
To get to the Assets folder of your theme, navigate to your Shopify dashboard. From here, go to: Online Store > Actions > Edit Code
Scroll down till you find the Assets folder and click add a new asset, select your font file and hit upload asset.
Installing your font in your theme
Next up: telling your theme that it can use the font file that you have uploaded.
Go to your theme’s main CSS file (usually named styles.scss.liquid, theme.scss.liquid, or another variation of this). This file can be found in the Assets folder of your theme – navigate to the bottom of this file to add new code into your theme.
Add the code below, replacing highlighted elements of the code with actual data. Font name > the name of the font, if the font has more than one word in it’s name it will need “quotation marks” – these will also be needed when inserting into Shogun. Filename > the name of the file that was just uploaded to your theme including the file extension, for example, cosmic_sans_bold.ttf. Format > the format of the font that was uploaded, for example, for Athena.ttf this would be “TrueType”.
Cody purchased this thermometer to replace a super old one we had. It is awesome! It has a magnet on the back so you can store it on the side of the fridge or microwave and it gives you an instant reading so no more burning your face off or losing heat on your grill with this guy.
PRODUCT INFORMATION:
🍗🍗Fast Respond: The instant reading thermometer responds in 3-5 Seconds and is accurate to ± 1℃/±2℉ degrees with a wide range of -58℉ ~ 572℉ (-50℃ ~ 300℃), you could calibrate the device if you need to, the calibration ranges from -3℃ to 3℃(-5℉~5℉).
🍖🍖Waterproof: The IPx5 rated waterproof thermometer is available both indoor and outdoor in rainy days, the function makes it perfect for liquids such as tea, hot chocolate, milk, bath water and so on. The function also makes the thermometer easy to clean, it can be washed with running water directly which is fast and convenient.
🍡🍡Rechargeable Battery: The 250mAh rechargeable lithium battery could last about 11 hours with backlight on once fully charged and it will automatically enter deep power saving mode if there’s no operation in 1 minute, the thermometer could last 3 months under the circumstance. It is quite convenient and eco-friendly as the change of dry batteries will not be needed any more.
🍔🍔Easy Operation&Convenient Storage: The foldable thermometer is simple to operate, open it to turn on the device and fold the probe back to turn it off. The foldable design and the internal magnet make storage conveniently, the shape is smaller than those can not fold back and the magnetic back make it possible to adsorb on the surface of household appliances such as ovens, refrigerators or other metal surfaces you want to.
🍟🍟12 Months Warranty:Inkbird provide 12 months grantee and lifetime service for all our customers! Please feel free to contact us at anytime you want to, we will reply in 24 hours!
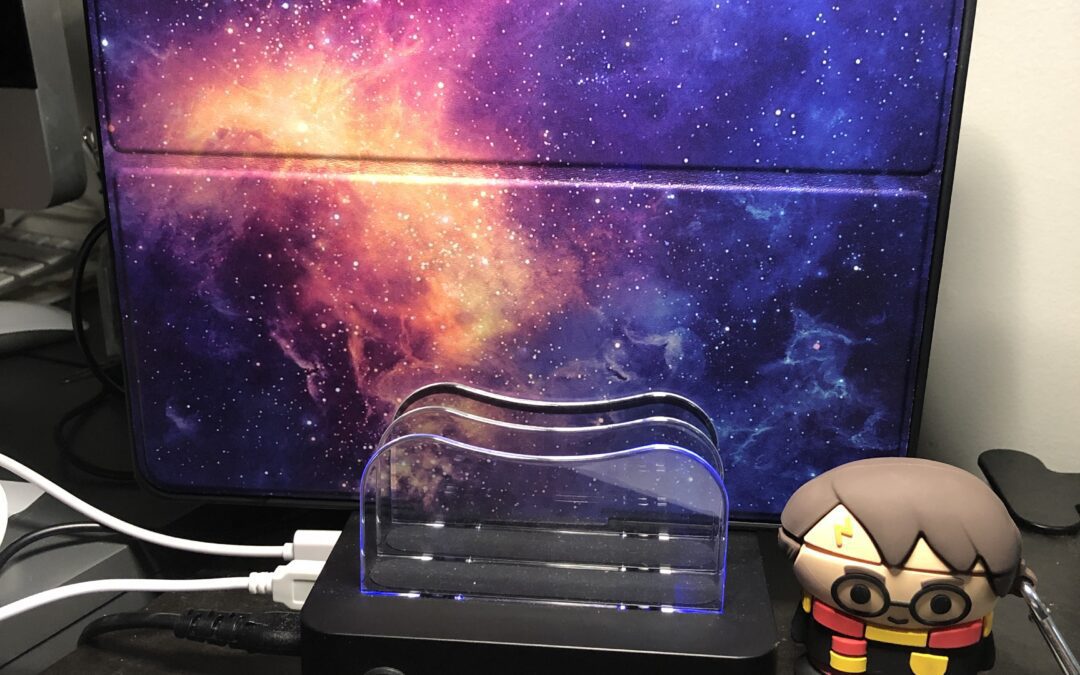
I purchased this base for a family solution for all the extra gadgets we have accumulated that needs to charge. The base has an on off switch located right on the front that makes it easy to turn the whole unit off. Each slot glows blue when its plugged into a device which is fun.
Can charger 6 usb devices at once and comes with various cord adapters so you don’t have to worry about use your own cords.
Definitely awesome addition to keep all the devices organized while charging.
6 slots, 6 USB ports and 6 cables. Hold and charge up to 6 devices. Our USB Charging Station works smoothly with devices such as Apple iPhone, iPad, Kindle and Android smartphones, tablets and more.
Our Docking Multi-device Organizer keeps everything in order. No more clutter cables. No need to plug a bunch of chargers on your power outlet for every phone and tablet you have.
Wide space and detachable clear plastic dividers. Our Multiport Charging Station has both wide space and detachable baffles which will accommodate any bulky mobile cases like the Otterbox Defender or device like iPad.
Built in Intelligent Chip and Surge Protection. Our Charging Station can charge any device that utilizes a USB cord – Bluetooth speakers, PS4 controllers, Fitbit, etc, and they will never get damaged from short-circuit, over-voltage, over-current and over-charge.
Never waste your money buying additional multi USB cords. Our Charging Station contains 6 short cables (8-inch) as follows: 3x Apple (Lightning), 2 x Android (Micro-USB) and 1 x Pcs Type C.
Outlook for Microsoft 365 Outlook 2019 Outlook 2016 Outlook 2013 Outlook 2010
Use email templates to send messages that include information that infrequently changes from message to message. Compose and save a message as a template, and then reuse it when you want it. New information can be added before the template is sent as an email message.
On the Home tab, in the New group, click New E-mail.
Keyboard shortcut To create an email message, press CTRL+SHIFT+M.
In the message body, enter the content that you want.
In the message window, click the File tab.
Click Save As.
In the Save As dialog box, in the Save as type list, click Outlook Template.
In the File name box, type a name for your template, and then click Save.
By default templates are saved in the following location:
Outlook for Microsoft 365 Outlook 2019 Outlook 2016 Outlook 2013 Outlook 2010 More…
Use email templates to send messages that include information that doesn’t change from message to message. You can compose a message and save it as a template, then reuse it anytime you want it, adding new information if needed. These instructions assume you’ve already created and saved a message template. For instructions on creating a message template, see Create an email message template.Newer versionsOffice 2007
These instructions assume you’ve already created a message template. To create an email message template, see Create an email message template.
To use an email message template, use the following steps:
Select New Items > More Items > Choose Form.
In the Choose Form dialog box, in Look In, click User Templates in File System.
The default templates folder is opened. The folder location (in Windows 7 and later operating systems) is c:\users\username\appdata\roaming\microsoft\templates. If your template is saved in a different folder, click Browse, and then select the template.
Select the template, and then click Open.
Make any additions or revisions to the recipients in the To, Cc, or Bcc boxes and any changes to the subject and message body.
Note: Changes made aren’t saved to the template. If you use the Save command, this creates a draft of your message, but won’t update the template.
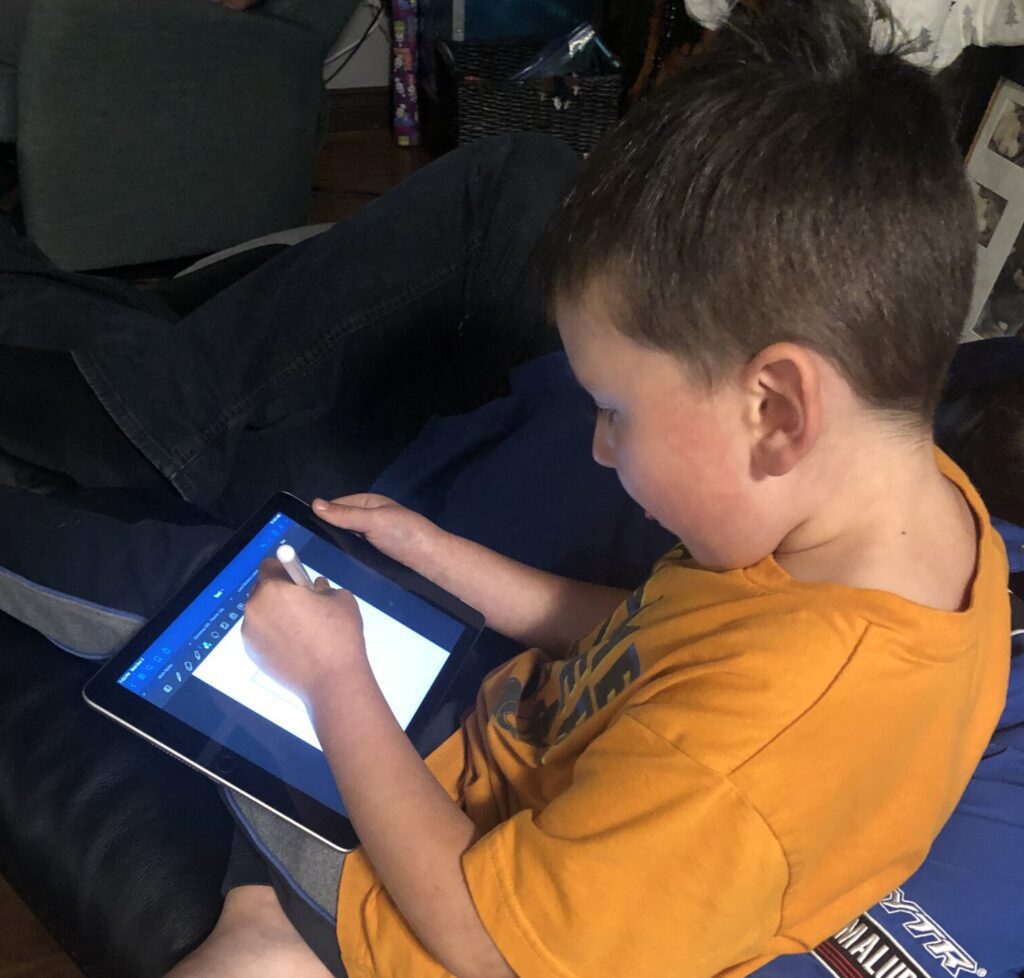
This pen is AMAZING! I purchased off of Amazon not thinking it would be much more than a simple stylus… BUT was pleasently surprised when I opened it today and used in on my 6th Gen iPad and WOW it is great!
I am using GoodNotes 5 app to write on PDF’s and such. So i orginally wanted an apple pen but couldn’t justify spending that much so like my Fake Apple Earpods I figured there had to be another maker of these little stylus pens.
I posted the link below of the same one I personally purchased. Go Check it out!
My Son had a great time using it as well! Good for all ages and easy to understand.
About this item
【 Precise & Palm Rejection】 SOCLL 2nd Generation Stylus Pen is taking upgraded POM Tip which makes the pen almost 100% precise to the point and smooth when writing on ipad,no lagging, no skips,no scratch to the screen .With palm rejection function,you can rest your hand on the screen just like with Pencil and paper. You can turn iPad into your notepad, canvas.
【Special for iPad】 –The 2nd Gen Stylus Pen is special for iPad 2018-2020 models :★iPad(6th&7th&8th Gen); ★iPad Air ( 3rd/4th generation; ★iPad mini (5rd gen);★ iPad Pro( 3rd/4th gen) 11 inches ,12.9 inches;❌Not for ipad pro 9.7″&10.5″ ,NOT for ipad pro 1st & 2nd gen or eariler version.NOT compatible with earlier ipad , iphone or android products.
【Excellent Long Battery Life】 – 20 hours continuous working time, 60-90 minutes per fully charge.90 days Standby time. Auto turn off after 5 minutes when not using to save power.The pen is using Type-C charging.
【Easy use &Comfortable Grip】- Simply touch the power button(pen top) to turn on it and you can use it on your devices right away. No need Bluetooth connection. Made of aluminum alloy with anodizing process,feels exquisite and comfortable to grip.Can Last up to 10 year without getting rusty.With CE, FCC, PSE and ROHS certification.
【IMPORTANT】:📌 1.If your ipad ever connect apple pencil bluetooth,it won’t work,pls go to Setings>Apple Pencil>Turn off the Apple pencil / or Settings>Notes>Turn off”Only draw with Apple Pencil.📌 2.Please notice that there is no different press sensitivity, all lines are at the same thickness. 【SERVICE】We offer professional After-Sales service, any problem will be responded promptly within 24hrs.
Give a user an additional “email alias” address (sales@)
As a G Suite admin, you can give a user an alternate address for receiving mail, in addition to a user’s primary address. Do this by adding an email alias to their account, in your Google Admin console.Example: If bill@solarmora.com wants a sales address for corresponding with customers, give him the email alias sales@solarmora.com. Mail sent to either address then appears in his Gmail inbox, and he can send email using either address.
Give users email aliases at no extra cost.
Important: Aliases are not private, and in some cases they’re visible to other users. For example, if a recipient searches Gmail for messages from bill@solarmora.com, search results might also include messages from his alias, sales@solarmora.com.
See more options: Rename a user or change a user’s email addressNew update being released: These instructions describe an updated version of this feature, which is currently rolling out to customers. If your organization’s account doesn’t yet have this update, your interface will appear slightly different.
Add an email alias for a G Suite user
You can add up to 30 aliases for each user, at no extra cost.
Tip (If available): Try the quick link. At the top of your Admin console Home page, click Create an alternate email address, search for the user, click Proceed, and then go to step 5 below.
In your Google Admin console (at admin.google.com)…
In the Users list, find the user. If you need help, see Find a user account.
Click the user’s name to open their account page.
Click User information Alternate email addresses (email aliases).
Click Alternate email and enter an alternate username (the part of the address that appears before the @ sign).Note: You can’t create an alias currently assigned to someone else, either as a primary address or alias.
(Optional) If multiple domains have been added in your Admin console, the field to the right of the @ sign is a menu listing available domains. Select a domain for the alias address.Note: Domains added as a domain alias don’t appear in this list. A domain alias applies for everyone in your account and can’t be customized for a single user.
Click Save.
(Optional) To return to the user’s account page, at the top right, click the Up arrow .
Within 24 hours (and often sooner), the user will begin to receive email sent to this address.
Send mail from an email alias
Creating an email alias lets the user receive email at that address. To send mail with the alias address in the From field, they need to set up a custom From address in Gmail. They must also do this to receive messages they send to their own email alias.
In the Users list, find the user. If you need help, see Find a user account.
Click the user’s name to open their account page.
Click User information Alternative email addresses (email alias).
At the right of the alias you want to remove, click Remove .Note: An alias with no Remove option was automatically added as a domain alias. This gives all your users an alias at this same domain. You can’t remove the alias for just one user. Instead, you need to remove the domain alias.
Click Save.
(Optional) To return to the user’s account page, at the top right, click the Up arrow .
It can take up to 24 hours for the alias to be removed.
Used only for email
People can use email aliases only to send and receive mail. They must keep using their primary address to sign in to their account, sync with a mobile device, or share Google Docs and Sites.
Related topics
Add a domain alias to give everyone in your account an email alias at another domain you own.
If you use a free theme from Shopify, then you might be able to reach out to Shopify’s Support team for basic technical assistance with this tutorial.
If you need more advanced customization but don’t have experience developing websites with HTML, CSS, and JavaScript, then consider hiring a Shopify Expert.
If you sell clothing items that require customers to know their size before they make a purchase, you can add a custom size chart to your product page.
All products that require reference to the size chart must have a Size option:
Caution
This tutorial doesn’t work for Narrative or the non-sectioned version of Brooklyn. If you use non-sectioned Brooklyn, then you can follow this customization guide that isn’t supported by Shopify.
Additionally, size chart tables are not responsive to all devices. They can be cut off the side of the page on mobile devices if too many columns of information are added.
Sectioned and non-sectioned themes
Note
The steps for this tutorial differ depending on whether you are using a sectioned or a non-sectioned theme. A sectioned theme is a newer theme that lets you drag and drop to arrange the layout of your store’s pages.
To figure out whether your theme supports sections, go to the theme’s Edit code page. If there are files in the Sections directory, you are using a sectioned theme. Non-sectioned themes were released before October 2016, and do not have files in the Sections directory.
If you are using a sectioned theme, click the Sectioned themes button and follow the instructions. If you are using an older, non-sectioned theme, click the Non-sectioned themes button and follow the instructions.
In the Content box, create a table that contains your size chart information. Customize the table to look the way you want it to:
In the Visibility section, make sure the page is set to Visible.
Click Save.
Adding the size chart to your theme
Desktop
iPhone
Android
From your Shopify admin, go to Online Store > Themes.
Find the theme you want to edit, and then click Actions > Edit code.
In the Sections directory, click to open your product-template.liquid file.
Add a Size chart button by pasting the following code above the Add to cart button:Copy{% if product.options contains 'Size' %} <a class="btn size-chart-open-popup" href="#size-chart">See size chart</a> {% endif %}
Add the following code to the bottom of the product-template.liquid file:Copy<div id="size-chart" class="mfp-hide"> {{ pages.size-chart.content }} </div> <style> #size-chart { border: 2px #555 solid; background-color: #ffffff; padding: 20px; max-width: 800px; margin-left: auto; margin-right: auto; } </style>
Click Save.
In the Assets directory, click theme.js. Add the following code to the bottom of the file:Copy$('.size-chart-open-popup').magnificPopup({ type:'inline', midClick: true });
Click Save.
Tip
If the size chart isn’t appearing, you might need to add extra code to your theme. Because Magnific Popup is required for this customization to work, some themes, such as Debut, require that you complete the following steps.
In the Assets directory, click to open your theme.scss.liquid file, or your timber.scss.liquid file, and add this css to the bottom.
Do one of the following:
If your theme has a vendor.js file in the Assets directory, open the file and add this code to the bottom.
If your theme does not have a vendor.js file in the Assets directory, place this code just above the $('.size-chart-open-popup').magnificPopup code in your theme.js file.
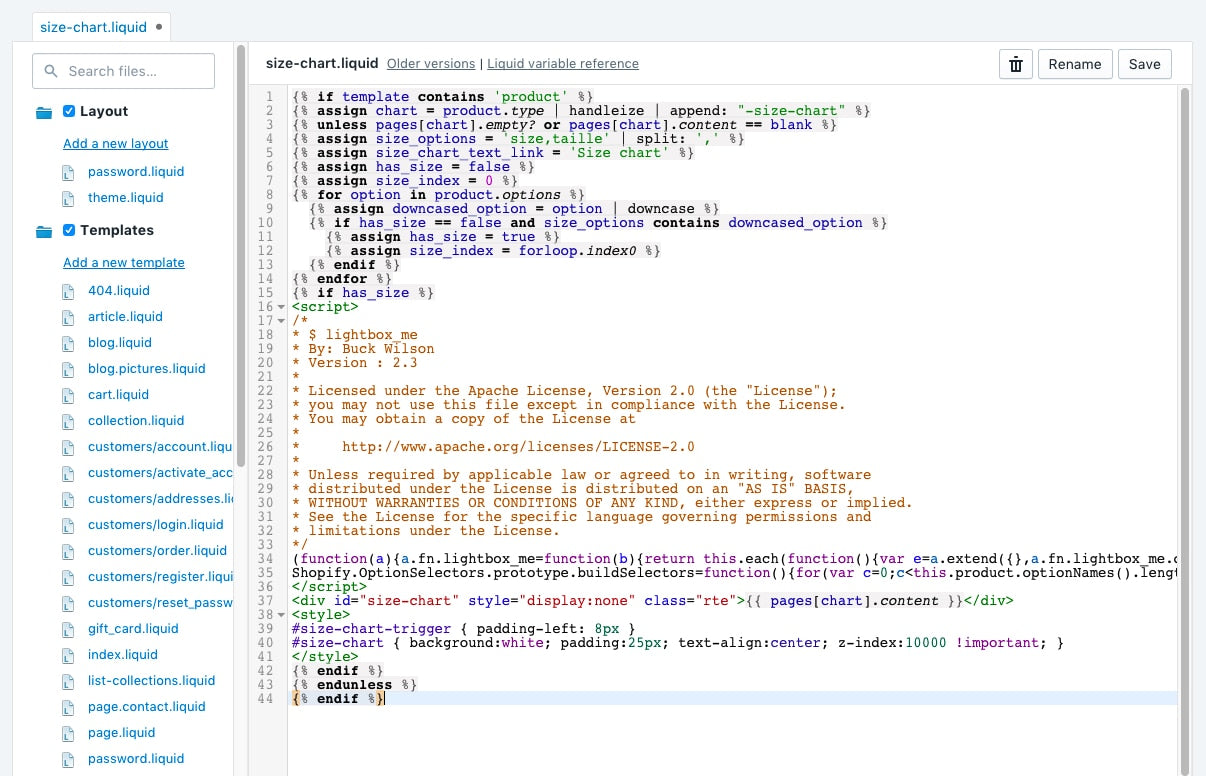
Return to your new size-chart.liquid snippet, and paste the code into the file:
Click Save.
In the Layout directory, click theme.liquid.
Find the closing </body> tag. Right before the closing </body> tag, paste the following code:Copy{% render 'size-chart' %}
Click Save.
Setting up a size chart specific to a vendor or product type
If you selected a size chart specific to a vendor or product type, you will need to make a size chart for each vendor or product type. The process is the same as making a chart for the whole shop, except you need to put the vendor or product type at the beginning of the size chart page title and handle. For example, if you have a vendor called Great Owls, your size chart page would be named Great Owls Size Chart, and the handle of the page would be great-owls-size-chart:
If your size chart is for a product type, you might have a chart for product type shoes. You would then call your size chart page Shoes Size Chart, and the handle would be shoes-size-chart .
Using a different language or changing the ‘Size chart’ text
If your store’s operating language is not English, or you want to use different text than ‘Size chart’ on your product page, you can make these changes in your size chart snippet.
Desktop
iPhone
Android
From your Shopify admin, go to Online Store > Themes.
Find the theme you want to edit, and then click Actions > Edit code.
In the Snippets directory, click size-chart.liquid.
Edit the size_options values to match the translation you have for your product option. Separate each option value with a comma.For example, to add a German translation, you might change the code to:{% assign size_options = 'size,taille,Größe' | split: ',' %}
Although Shopify can generate templates, you’re responsible for following your published policies. Review your policies carefully before adding them.
Note
Templates for your store policies are available only in English. If you operate your store in another language, then you need to create your own store policies. Contact a local law expert for help.
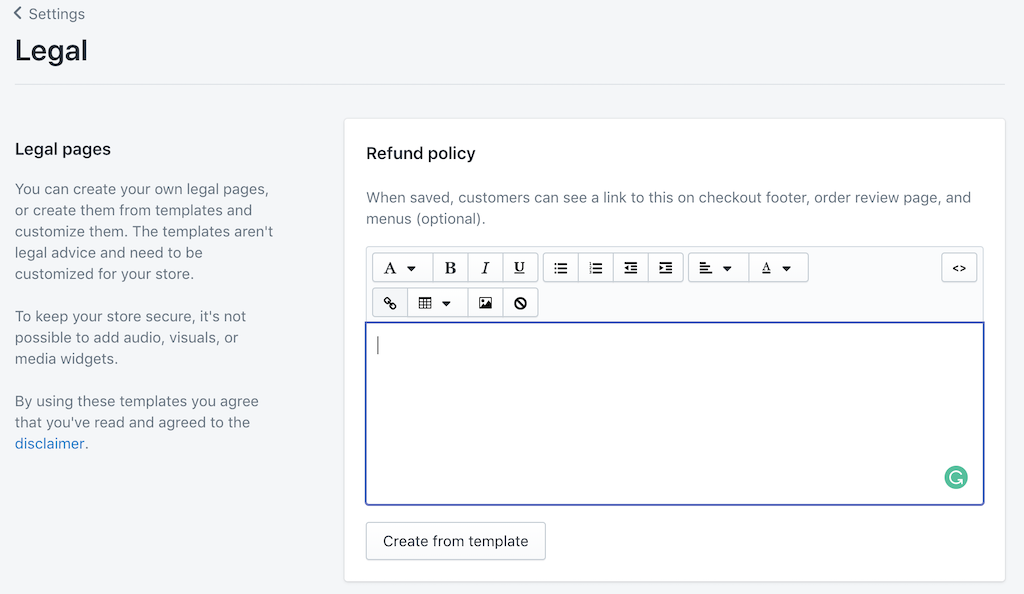
Enter your store policies, or click Create from template to enter the default template. Use the rich text editor to add style and formatting to your policies, and to add links and images.
Review your policies and make any changes.
Click Save to add your policies.
When you add your store policies, they are automatically linked in the footer of your checkout pages. Customers might need to see your policies before they check out, so it’s a good idea to link those pages in your store navigation.
You can create webpages in your Shopify admin. Webpages are useful for publishing information that rarely changes or that customers reference often, like a “About us” page or a “Contact us” page.
If you use a free theme from Shopify that was downloaded after November 2018 and you’ve added your shipping policies, then the product pages on your online store include a link to your shipping policies. This is to communicate any additional costs associated with the product, or shipping conditions.
You can remove this link by editing your theme’s language.
Steps:
Go to Online store > Themes.
Beside your current theme, click Actions > Edit languages.
In the search box, type shipping policy html.
In the Shipping policy html box, replace the contents with a single space.
Click Save.
Add policies to your store menus
By default, links to your policies are listed in your checkout footer. A link to your refund policy is also listed on your order review page. A link to your shipping policy is listed on your product pages and your cart.
You can update your menus to include these policies.
Go to Online Store > Navigation.
Click the name of the menu where you want to add the policy.
Add the policies that you want to the menu:
Click Add menu item.
Enter a name for the policy’s menu item, and then search for your policy.
Click Add.
Click Save menu.
Add links to your policies within pages or on social media
You can add direct links to your policies by adding the following to the end of your store’s domain name:
Refund policy: /policies/refund-policy
Privacy policy: /policies/privacy-policy
Terms of service: /policies/terms-of-service
Shipping policy: /policies/shipping-policy
For example, if your domain name was johns-apparel.myshopify.com, then a direct link to your shipping policy would be johns-apparel.myshopify.com/policies/shipping-policy.
Add a COVID-19 prevention policy
You can inform your customers about the changes that you’re making to your store’s policies during the COVID-19 pandemic. This can help customers feel reassured that their shipments are being handled in a clean environment, and that precautions are being taken to ensure their safety. You can use any or all of the following options.
Add a prevention policy as a page on your site
You can create a specific COVID-19 prevention policy page and add it to a menu, such as your main menu or footer menu, on your website.
Steps:
From your Shopify admin, go to Online Store > Pages.
Click Add page.
Enter the title and the page contents.
Click Save.
Go to Online Store > Navigation.
Click the name of the menu where you want to add the page.
Click Add menu item.
Enter a name for the page’s menu item, and then search for your new page.
Click Add.
Click Save menu.
Update your store policies
You can add virus or disease prevention clauses to your store policies. For example, consider updating your shipping policy to include the following information:
How your store handles shipping delays caused by viral prevention measures, such as countries closing their borders or not accepting international shipments.
Shipping sanitation measures your store takes during viral outbreaks.
Any changes to your return shipping policies during viral outbreaks.
Steps:
From your Shopify admin, go to Settings > Legal.
Optional: If you don’t have a Refund policy, Privacy policy, or Terms of service, then you can click Create from template to use a default template.
Update your policies.
Click Save.
Create a blog post
A blog post can be a great way to explain how your store is addressing COVID-19 concerns using a less formal tone than you’d use in your legal policies.
Blog posts are hidden by default and don’t appear on your online store unless you set them to be visible.
Steps:
From your Shopify admin, go to Online Store > Blog Posts.
Click Add blog post.
Enter a title.
Enter the blog post content. This field uses the rich text editor, so you can format your post content. You can also add images, embed videos or other media, or insert links.
Choose the settings for your blog post:
Author: From the drop-down menu, select the name of the person writing the post. Only the names of the store owner and staff members appear in the drop-down menu.
Blog: Select the name of the blog where the post will be published. If you don’t want to publish to one of your existing blogs, then you can create a new blog in the drop-down menu.
Optional: Display an image on the blog landing page. Click Upload image in the Featured image section, and then select an image to upload.
Optional: Include an excerpt from your blog post on the blog landing page.
Optional: Add tags to your blog posts to organize them by category or subject. Customers can click tags to find other blog posts in the same category. When a customer searches for a tag in your online store, matching blog posts will appear in the search results. Enter tags, separated by commas, in the Tags field.
Optional: If you have created a custom template for blog posts, then you can select a template. In the Template drop-down menu, select the template that you want to use for the post.
Optional: Edit the search engine listing for your blog post in the Search engine listing preview section.
Optional: Make your blog post visible. Select Visible in the Visibility section, or set a specific publishing date for the post. You can edit or delete a published blog post at any time.
Available CRM and Customer System Integrations for Lead Ads
Customer relationship management (CRM) software allows businesses to build and manage relationships with prospective and current customers. Integrating your CRM or other customer system with Facebook can help ensure that the leads you generate through your Facebook lead ad campaigns are followed up with in a timely manner and may yield a higher rate of conversion.
Use the search bar below or the scroll function at the bottom of the page to search through available CRMs for Lead Ads and Lead Generation in Messenger. Once you find the one you want to use, click on the icon for integration instructions
MailChimpType of integration:Third party integrationDirect Integration
Integrate MailChimp with Lead Ads
Go to your Facebook Page.
Click Publishing Tools at the top of the Page.
Click Leads Setup.
In the search bar, type the name of the customer system you’re interested in integrating with to see if it’s available. You’ll know it’s available if a blue Connect button or a link that says Connect from website appears.
Click the link or blue button to start the integration flow.
Add a custom Mailchimp email campaign archive to your website and allow visitors to view your recent campaigns, which can improve visibility and your site’s SEO. Choose to embed our archive generator code, or design and host your own custom campaign archive for additional control. We’ll automatically update the links in the archive each time you send a campaign.
In this article, you’ll learn how to add a campaign archive to your website.
Before you start
Here are some things to know before you begin this process.
This is an advanced feature and is recommended for users familiar with custom coding. Contact us if you need assistance!
If you’re not comfortable with code, share your audience’s email campaign archive on the web to showcase your recent campaigns.
It may take up to 48 hours for your latest campaign to appear in your campaign archive.
This feature is compatible with both http:// and https:// sites.
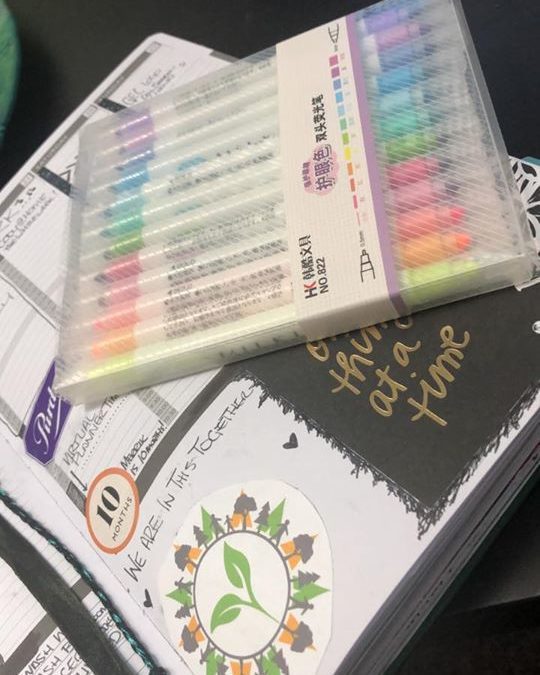
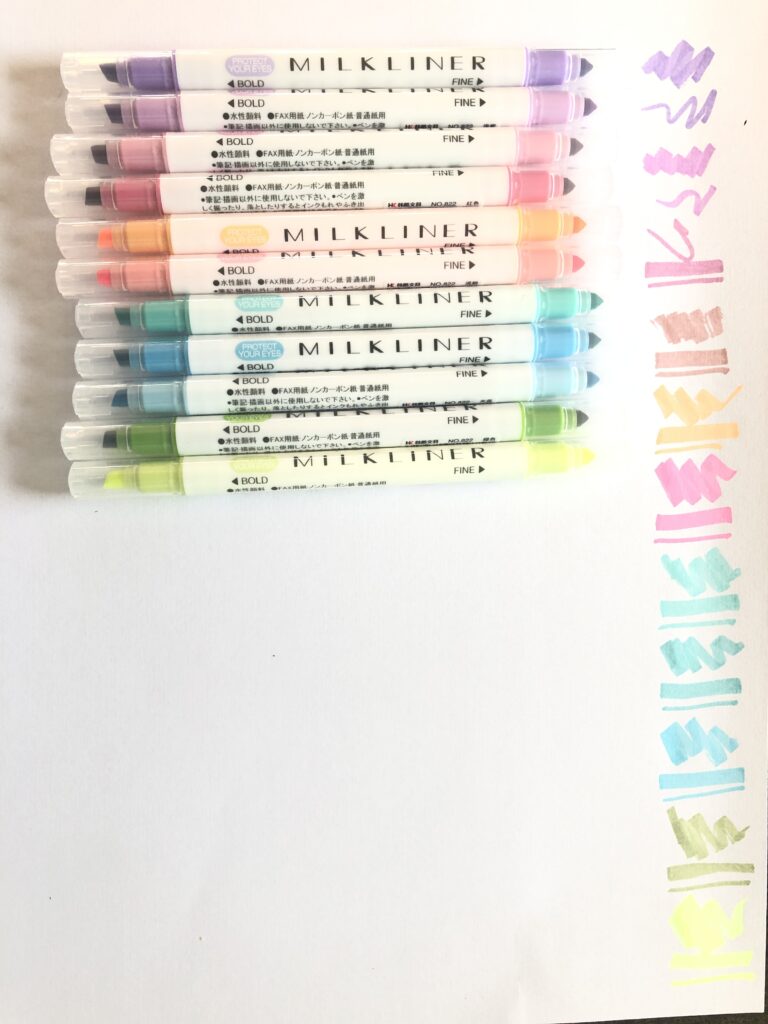
Ok. I caved. I really loved them. So I got them. Delivered… Yesterday! #happymail So after a couple of months of wanting these pens I broke down and ordered them! They are so LOVELY!
The dual tips are really nice and they are a pastel like appearance and work well over the sharpie pens too.
I use them all the time! They are great for adding that tiny bit of color to any spread without being over bearing in my planner.
With this tutorial you will use Adobe Photoshop and Adobe Premier Pro:
First step is to get the image files ready.
Take a look at all the files you wish to merge into your time lapse video. Depending on the amount of photos you will need to adjust the file names of your jpeg files. We need them to be numbered in sequential order with no spaces. Hyphens or underscores will work fine. Make note of how many files you have. For Example, if you have 10,000 photos your sequence will need to include 5 zeros (00000) to make sure your photos are showing in order. So your file name will have to look like clouds-00001.jpeg They need to be all in order with “no gaps” in sequence.For example: clouds-01234.jpeg, clouds-01235.jpeg etc.
Open Adobe Photoshop:
Click file OPEN
Find folder with all photos in sequential order.
Click photo on the first photo in the sequence and then click OPTIONS (bottom Left)
Select “IMAGE SEQUENCE” Then Click OPEN
Frame Rate select 29.97 from drop down click OK You will notice in your layers panel there is a video group with layers Switch Workspace to “MOTION” If the playback is choppy: we can adjust the playback resolution (don’t worry it wont downgrade the quality of the video) Click on the Gear Change Resolution to 25%
First thing you might want to adjust is the speed on which the photos are played back. “Right click” on the Layer’s Timeline and adjust speed to 200% or whatever you would like the pictures to play through. You can make video image adjustments in the “Adjustments” panel to give you a clearer photo or adjust colors etc. You can also adjust the full length of your video by dragging the toggles on top of your video/layer timeline to shorten or lengthen your video. Once you have adjusted your length and speed and color adjustments – you can export!
Click FILE > export > Render Video… Select Folder: where you want it saved. Choose: Adobe Media Encoder Format: H.264 High Quality Document Frame Rate: 29.97fps Range: It will save your adjustments to your work area or you can specify which frames you wish to export.
Click Render. It will save in the location you specified to save in.
If you are happy with the time lapse MP4 Export then you can take it into any program to add extra slides etc or upload to youtube as you wish.
Editing your time lapse in Adobe Premier Pro
OPEN ADOBE PREMIER PRO
File > Open your exported MP4 file from previous steps. In the location that is was saved in.
Once your video is open in Premier Pro: Right Click on the video in the bottom left. Select “New Sequence from Clip” Edit what you did in photoshop by doing a simple “Pan and Zoom”: Move your timeline marker to the end of your video Select the “Keyframes” by clicking on the “Position” icon and “Scale” icon on the left “Video Effects” Panel Go to the Beginning of your clip and Focus on your specific object by adjusting the Scale and Position to highlight your object on screen.
You can preview your full clip until you are completely satisfied with the finished product.
Export from Premier Pro by selecting File > Export > Media…
When your finished video is ready to start the export, open File, go to Export, and then to Media. A pop up with several settings will appear, and you can select one to export the video.
Choose the Video to Export:
When exporting, you may opt to have the whole video or a part of it exported. The settings of export video premiere pro offer you the freedom to select the entire clip or a part of it before rendering. If it’s a part of the clip you want to export, drag the handles at the preview from the beginning to the end of the video you want. The handles on the right side take you to the end while the left ones take you at the start of your clip. There is a Source settings menu where you can check your selected video portion. It offers the option to crop the video’s resolution before sharing it on a platform.
Choosing the format:
You have several options for selecting a video format of your choice. It may be confusing if you are not well versed in them. The ideal format to use when exporting adobe premiere is the H.264. The format’s compatibility with various devices makes it the right one for you. It makes your work easy as it can compress your video and, at the same time, retain its quality
Choose a Preset:
To start, select Preset, and from the dropdown menu, select quality and resolution settings. From the options that appear, you can use any you desire for exporting the video. In the export video premiere window, you will find several presets that you can use for your video playback or the destination site.
To be on the safe side, choose presets that will match with the site you wish to upload your video to. Another point to note is that when setting your video quality, do not place it too high than its resolution. It may spoil your video footage as the resolution will be higher.
This article is for Google Workspace users. To begin administering GWSMO, go to GWSMO Admin Help.
Installing Google Workspace Sync for Microsoft Outlook (GWSMO) also installs Google Workspace Migration for Microsoft Outlook (GWMMO), which lets you migrate your Outlook data to your new Google Account. We recommend using this migration product if you want to stop using Outlook entirely.
Before you begin
If you haven’t already, sign in to your Google Account to accept Google’s Terms and Conditions.
Make sure that you install GWSMO on the computer where you use Outlook.
Before you install GWSMO, make sure Outlook is not running.
Option 1: I’m downloading and installing GWSMO myself
Review these system requirements for your computer.Before continuing with the installation, install any updates to your version of Outlook or Windows.
Option 2: My admin downloaded GWSMO to my computer
Install GWSMO based on your version of Windows:
Windows 7 and up—From the Start menu, click Microsoft System CenterSoftware CenterApplicationsGoogle Workspace SyncInstall.For more information on Software Center, consult your Microsoft documentation.
Earlier versions of Windows—In Control Panel, click Run Advertised ProgramsGoogle Workspace SyncRun.
Let’s make sure you’re in the right place. This article is for users setting up Google Workspace Sync for Microsoft Outlook (GWSMO) so they can synchronize their Google Account with Outlook. For help signing in to your nicole@mediawizardstudios.ca account, ask an administrator at mediawizardstudios.ca. Who is my administrator? Note that GWSMO does not work with your personal (@gmail.com) account.
After you install Google Workspace Sync for Microsoft Outlook (GWSMO), you’re prompted to sign in with the Google Account you use for work or school, like nicole@mediawizardstudios.ca.
To sign in:
Enter the email address for your Google Account and click Continue.
Enter your password and click Next.
Click Allow to provide GWSMO access to your Google Account.
Google, Google Workspace, and related marks and logos are trademarks of Google LLC. All other company and product names are trademarks of the companies with which they are associated.
With Google Workspace Sync for Microsoft Outlook (GWSMO), you can import your Outlook data to your Google Account from the following source environments:
an existing Outlook profile
a Microsoft Exchange profile (if you’re using Exchange)
a PST file containing data exported from Outlook
Option 1: I’m ready to import data now
In the Set Up Google Workspace Sync for Microsoft Outlook box, check the Import data from an existing profile box. Then, select an option:
An existing Outlook profile (default).
If your Exchange profile is listed, select the profile name to import directly from Exchange.
If you’ve exported your data from Outlook to a PST file, select From a PST file. Browse to the file on your computer.
Note: If the options are grayed out, you need to install a separate tool to import data. For details, go to Turn on import options.
(Optional) Check the Send crash reports and usage statistics to Google box. For details about what information is sent, go to Send usage and crash reports.
Click Show advanced settings.
Check the Turn AutoArchive off box to keep a copy of all your archived messages.Now, your archived messages will go to a new Archived folder that is synced with your Google Account.
If you’ve already imported data into your Google Account, do not re-import the same data. You might end up with duplicate calendar events, contacts, or notes. Go to Start using Outlook.
— Where to Advertise your business for free or paid services in
GRANDE PRAIRIE, AB
Being in the media / web / technology industry in Grande Prairie, Alberta for the last decade. We have found the need to have an unbiased list for advertising your business in Grande Prairie. No Fluff, just the good stuff – specifications, locations maybe even pricing… everything you need in one place for your business!
We have taken multiple years to compile this list with valuable information such as government traffic data and potential website traffic stats etc.
Why? Personally made it easier for US… HAHA! We always want our clients to take advantage of anything within their reach! This map was created just so you can make the most informed decision for your marketing dollars. This is a live map and work in-progress… so comments are appreciated!
PLEASE NOTE: We have not been paid to promote any of these locations.
ADVERTISERS, We hope potentially you will see your referral traffic boosted from our website (MediaWizardStudios.ca) to YOURS 🙂 >> CLICK HERE FIND OUT HOW TO SEE REFERRAL LINKS IN YOUR OWN ANALYTICS<<
Digital Billboards are becoming a popular way to advertise. Cost to create graphics and change up your marketing on the fly is way more cost effective.
General campaign graphics can be used across digital marketing (Social, Google, Bing (SEM) etc.) Then cascaded on the big screens across the city in a few steps!
If you are looking to have some graphics created for your business no matter the medium – CONTACT US.
Need more information on City of GP Permits and signage regulations? CLICK HERE.
REILLY DIGITAL SIGNS
TWO (2) – 10’x20′ Outdoor Digital Billboards
Located on Highway 40 (South) Correction Line – Reilly Transfer Yard
SPECS: 7 second ads, 4 week flight Dimensions: 384w x 192h pixels. Format:PNG or JPG
DRIVER Advertising
STATIC + DIGITAL BILLBOARDS
SPECS: 7 second ads, 4 week flight Dimensions: 576w x 288h pixels. Format:PNG or JPG
The Grande Prairie & District Chamber of Commerce provides the exclusive opportunity for our Members to advertise on our digital sign. Located outside of Centre 2000 on 116 Avenue and 106 Street, this sign is stationed at one of the busiest intersections in Grande Prairie.
Digital billboards capture the attention of a wide range of different commuters. Capture their attention and reach a massive audience. With weekly, monthly, and yearly booking, we have options to meet all advertising budgets. Not-for-profit Member rates are also available.
For rate information, contract terms and design guidelines, please contact Leah Fujarczuk by phone at 780-532-5340 or email leah@gpchamber.com
In Alberta and Saskatchewan, we are extremely well distributed in Fine Dining establishments, Fast Food restaurants, Coffee Shops and places where people wait throughout the region. Coffee News® provides a few minutes of light reading while the order is taken and the meal is prepared. Since most patrons can read Coffee News® in about eight minutes, they have plenty of time to read all the ads as well. Coffee News® works!
GP Chamber Member Connections is issued on the 1st and 15th of every month and distributed by Constant Contact email to our membership and shared on our social media pages.
The Chamber Member Connections newsletter provides FREE advertising opportunities to our members – allowing them to promote their accomplishments, sales, and special events to the entire Grande Prairie & District Chamber of Commerce network and beyond.
Submissions: Chamber Members Only – must be limited to no more than 250 words, one logo and/or one .jpg, .pdf, or .png image, and should be emailed to tom@gpchamber.com no later than three business days prior to publication to allow for editing.
TEEPEE CREEK STAMPEDE PROGRAM
EVENT
— ADVERTISING THROUGH EVENTS & SPONSORSHIP
OPPORTUNITIES
Events are a great way to expose yourself to the local culture and really get to know how your real life audience interacts with your brand, product or business as a whole.
We have included some local events that have advertising opportunities or bundles with sponsorship.
COMMUNITY CONNECTIONS
Your connection to what’s happening in Grande Prairie!
Published: Quarterly
Community Connections contains details about programs for all ages, events and important information for residents of the City of Grande Prairie.
Ad Sizes: Quarter Page – 3.375” x 4.625” Half Page (Horizontal) – 7” X 4.625” Full Page – 7” X 9.5”
STORM PROGRAMS
STATIC + DIGITAL BILLBOARDS
SPECS: 7 second ads, 4 week flight Dimensions: 576w x 288h pixels. Format:PNG or JPG
TEEPEE CREEK STAMPEDE
This 100+ Year old event has its own program, multiple event centres and viewing areas to showcase your business visit tpstampede.ca for full details on how you can become apart of 4 DAY IN THE WILD!
Websites
— CROSS MARKET YOUR BUSINESS WITH LOCAL
ONLINE LISTINGS
Looking to cross promote your business on multiple websites? Some of these websites are free listings and some are paid.
Free/Non-Profit Community Billboard. Each Store will have to approve posters and events. Bring Tape or Magnets
BOOSTER JUICE - KATERI DRIVE
Free/Non-Profit Community Business Card Board. Bring a Push Pin
Black Framed Cork Board
DAIRY QUEEN SOUTHSIDE
Non-Profit Community Billboard just inside the front door. Bring Stapler or Push Pin
55A KAFFEE (INSIDE TEAL IDEAL)
Large Business Card Cork Board in front of till. Purchase your coffee or sweet treat & Bring Stapler or a Push Pin and good luck fitting your card in there somewhere 🙂
Having issues with page role requests on your company Facebook page? Don’t worry, you’re not alone. Unfortunately this happens pretty often, but there’s usually a way to get around it.
If you’re trying to get someone to add you to a Facebook page:
First, you need to LIKE the page to which you’re trying to be added as a user.
If someone sends you an page role request and you don’t see the request as a notification when you login to Facebook, follow this link: https://www.facebook.com/pages/?category=invites and you should be able to see and accept the request there.
If you still can’t see the request, you should wait an hour or so and then log out of Facebook and log back in.
If you’re trying to add someone to your Facebook page:
If you’re already a user on the Facebook page, but are trying to add another user, here’s what you need to do (if you are NOT an Administrator on the page, then you need to have an Administrator complete the following steps):
Login to your personal Facebook and go to the Business page.
Click Settings at the top right of the Page.
In the left column, find and click Page Roles.
Under Assign a New Page Role, type a name or email in the box and select the correct person from the list that appears.
Click Editor to select a role from the drop-down menu, and then select Admin.
Click Add and enter your password to confirm.
If the person you’re trying to add doesn’t show up in the drop-down list, then you need to make sure the person has LIKED the page you’re trying to add him to.
Reasons your site doesn’t rank — and how to fix poor rankings
A number of factors can influence your site’s Google rankings (or lack thereof).
Here are six reasons you might be wondering “why isn’t my website showing up on Google” and what you can do to fix it.
1. Your website isn’t indexed
Sites that aren’t indexed by Google won’t show up in search results — and there are several reasons your site isn’t being crawled and indexed by Google bots.
Your site is new
If your website is new, keep in mind that it can take several weeks for Google to index your site and reflect the changes in search results.
This is especially true for new websites since they don’t typically have many inbound links. Google considers both the number and quality of inbound links to sites when ranking them. It takes time to build up your domain authority, so don’t expect to see immediate rankings for a new website.
Your site has “no index” tags
If you have an older site that isn’t indexed, check your use of “no index” tags before searching “my website isn’t showing up on Google.”
Adding “no index” code to your site prevents search bots from crawling and indexing specific pages.
While there are some instances where you’d want to use “no index” tags, you’ll want to consult an SEO agency to make sure it’s done right and doesn’t prevent pages you want to rank from appearing in search results.
In addition, a robots.txt file can prevent Google crawlers from visiting entire portions of your site, so you’ll want to make sure you didn’t accidentally disallow pages you want to rank.
Websites that operate on WordPress have built-in features that instruct search engines not to index the sites. Owners need to disable the setting manually by visiting Settings >> Reading and unchecking the box next to Search Engine Visibility.
Wondering “how to index my site on Google”? Take a look at these tips
How to fix a non-indexed site
If your website isn’t indexed on Google, start by creating an account on Google Search Console.
This allows you to direct Google to your sitemap.xml and request it to crawl and index your URLs. It’s important to remember, though, that Google doesn’t guarantee site indexing, and if your site is new, it may still take time to rank in search engine results pages (SERPs). You can also update your site’s “no index” tags in your code and robots.txt to ensure Google bots can find, crawl, and index your pages.
2. Your website has a penalty
Penalties can also prevent your site from ranking in Google search results.
If your site doesn’t meet Google’s quality guidelines, it may temporarily or permanently remove your site from search results.
Google penalties include:
Deindexed: Google completely removes your domain from search results.
Penalized: Your domain still exists, but you can’t find your pages via direct search. This penalty may result from a Google algorithm update, or Google can manually apply it.
Sandboxed: Your Google traffic drops suddenly, but your domain wasn’t Deindexed or Penalized.
How to fix a Google penalty
Check Google Search Console for penalty alerts. If your site gets penalized, you’ll need to take steps to modify your website to meet Google’s guidelines. Then, you can submit your site for reconsideration to get back on Google.
3. Your website isn’t optimized for search
If you’re searching “my website doesn’t show up on Google,” you might need to beef up your SEO.
Search engines like Google consider hundreds of factors when rankings sites — and SEO helps you ensure your website’s optimized to rank at the top of SERPs.
SEO spans several strategies designed to boost your rankings and help you earn more conversions (and revenue) online. You can have the most beautifully designed site, but without SEO, it won’t rank in SERPs. Not to mention, nobody will be able to find and contact your business.
How to fix a website that isn’t optimized for search
Start by conducting a comprehensive SEO audit of your site. An SEO audit allows you to identify areas for improvement and make the necessary fixes to achieve top rankings.
When optimizing your site for search, here are a few things you’ll want to consider:
Clean up your site’s code and technical SEO
Ensure your site loads quickly
Streamline your website design and navigation to provide a positive user experience
Include target keywords in your site copy, headings, and page titles
Create in-depth, quality content that answers searchers’ questions
Depending on your time and resources, you may decide to spring for a custom SEO package.
4. Your website’s content sucks
Speaking of content, if your site copy sucks, there’s a good chance your site won’t show up in Google search results.
Search engines like Google want to rank sites that provide quality content that matches a searcher’s intent and satisfies their queries.
When creating content, aim to make it comprehensive enough that it fully answers searchers’ questions, so they don’t have to hit the back button to check out other results.
While you don’t need to create full-length guides to rank in SERPs, it’s essential to provide searchers with valuable content that keeps them engaged on your site — and encourages them to contact you to take the next step.
How to fix content that sucks
If your content leaves something to be desired, consider partnering with a full-service content marketing agency like WebFX to create custom site content. Our team understands how to create content that ranks in search results, and we’ll help you beef up existing pages to improve your position in the SERPs.
It’s also important to remember that search engines and users like fresh content, so keep yours updated regularly to achieve the best results.
5. Your keywords are too competitive
If you’re reading this post and thinking, “My content’s great and my website still isn’t showing up on Google,” then it’s time to revisit your keyword targeting.
Trying to rank for highly-competitive results, especially when competing with bigger brands, can sometimes leave your business in the dust. Instead, consider targeting long-tail, more specific phrases that contain three or more keywords.
While long-tail keywords have lower monthly search volumes, they are also less competitive, giving you a better chance of ranking at the top of search results. In addition, long-tail keywords typically have a more specific search intent.
For example, if someone searches a generic keyword like, “tent,” it’s hard to determine exactly what they want to find.
Do they want to know how to set up a tent? Are they researching the best tent for their next camping trip? Do they want to buy a specific type of tent?
On the other hand, if someone searches the long-tail phrase, “buy two-person backpacking tent,” you know that they’re ready to purchase.
Companies that sell outdoor gear will have an easier time ranking for the long-tail phrase “buy two-person backpacking tent,” and they can create content that matches that specific intent.
How to fix an overly ambitious keyword strategy
Successful SEO campaigns always start with keyword research.
Using tools like Keyword Tool, Ubersuggest, and Google’s Keyword Planner, try to identify long-tail keywords with less competition that offer the most value to your business. Targeting less competitive phrases will allow you to show up in Google results and reach more customers online.
6. Your site doesn’t provide a good user experience (UX)
Finally, if your website delivers a poor user experience (UX), you can kiss top rankings goodbye.
Search engines want to rank valuable content and websites that provide visitors with a great experience. If users don’t have a positive experience on your website, they’ll waste no time hitting the back button — a signal to Google that your site shouldn’t rank.
Improving UX on your site can reduce bounce rates, engage visitors, and help them learn more about your business, all while helping you rank higher in search results.
How to fix a poor UX on your website
A few quick fixes can take your UX and site rankings to new heights. To improve your site’s UX, you can:
Speed up your site’s load time with page speed optimization services
Streamline your site’s navigation to make it easy to find information
Include visual elements to break up content and engage visitors
For more info on improving your site’s UX, check out our user experience analysis services.
Take charge of your rankings with SEO services from WebFX
WebFX offers custom SEO services to help your business rank at the top of search results and earn more revenue online.
We’ll audit your SEO strategy to determine why your site isn’t showing up on Google and help you implement solutions that drive results — and prevent you from searching “my website isn’t showing up on Google.”
Want to learn more? Contact us online or give us a ring at 888-601-5359 for a free SEO quote!
LastPass has been a GODSEND for my personal life and business needs. In the age of technology there is a password and login for EVERYTHING.
What if you didnt have to think of your own password? What if you could store all your password in a secure platform that you can access from every device similar to apple’s “keychain”
Well look no further! Last Pass is your answer to recording your passwords, secure notes and even sharing family passwords so no one is locked out.
You can add it to your web browser as an extension or download the Android or iOS app from the App Store. I have mine setup to my apple Face ID so I don’t even need to type in the master password any more when browsing. Got to love technology!
A lot of clients are striving for the ultimate portal to capture their reviews. However, the answer isn’t always simple… You want to have reviews on all platforms as reviews on Facebook, Google and Yelp have other benefits than just telling your clients how awesome you are… reviews also help in Search Engine Optimization.
Ever wonder why the competition is always beating you in Map results? Take a look at your reviews.
Are they 5 stars? Text and Rating or just rating? The competition is actively responding to their business profile comments and reviews. They outscore your one lonely 5-star rating 10 fold… Step up your game! Start asking for that review after your sale.
In this article, I will be helping you get linked up to your social review profiles. Some of these may or may not pertain to your set demographic. If you are feeling overwhelmed with asking for all platforms; work on the main ones (Facebook and Google) to start.
Facebook Review Link:
To find your review link simply navigate to your facebook page. ex. https://www.facebook.com/MediaWizardStudios/
Then simply add reviews/ to the end of your weblink https://www.facebook.com/MediaWizardStudios/reviews/
This isn’t a direct “Add your review” link but it will get them to the right page.


 .Note: An alias with no Remove option was automatically added as a domain alias. This gives all your users an alias at this same domain. You can’t remove the alias for just one user. Instead, you need to